Parametric Lube Skid for Hydraulic Service Truck
Design and documentation of a dual-lined steel lube skid for storing and handling hydraulic fluids on a service truck, built as a fully parametric Fusion 360 model ready for CNC manufacture.
Summary
A client engaged me to turn a hand-drawn concept into a manufacturable lube skid: a heavy-duty steel module for storing multiple grades of hydraulic oil on a service vehicle. I designed the complete structure in Fusion 360, built it as a parametric model, and produced the fabrication drawings required for CNC laser cutting and assembly. The project highlighted both the power and the limits of my initial bottom-up modelling approach, and directly informed how I now structure large parametric assemblies.
Client-driven design from rough sketch to build-ready CAD and drawings
Parametric sheet-metal modelling with user-driven dimensions and tolerances
Dual-lined cell construction for impact protection and containment
CNC-ready tab-and-slot detailing with ±0.5 mm manufacturing tolerance
Lessons learned in Fusion 360 assembly structure, drawings, and master modelling
Context
Lorem ipsum dolor sit amet, The client services large industrial machinery in the field and needed a robust way to transport and handle multiple hydraulic fluids. Off-the-shelf tanks didn’t meet his layout or protection requirements, so he wanted a custom lube skid that would:
Fit a defined footprint on the truck deck
Provide multiple independent storage cells
Use dual-lined walls to protect each cell from external impact and add containment
Integrate forklift pockets and crane lifting points
Be suitable for CNC laser cutting and workshop fabrication
In parallel with meeting those requirements, I set myself an engineering goal:
Build the skid as a fully parametric model that could be resized or reconfigured by changing a small set of user parameters, rather than redrawing plates from scratch for each variant.adipiscing elit. Ut elit tellus, luctus nec ullamcorper mattis, pulvinar dapibus leo.
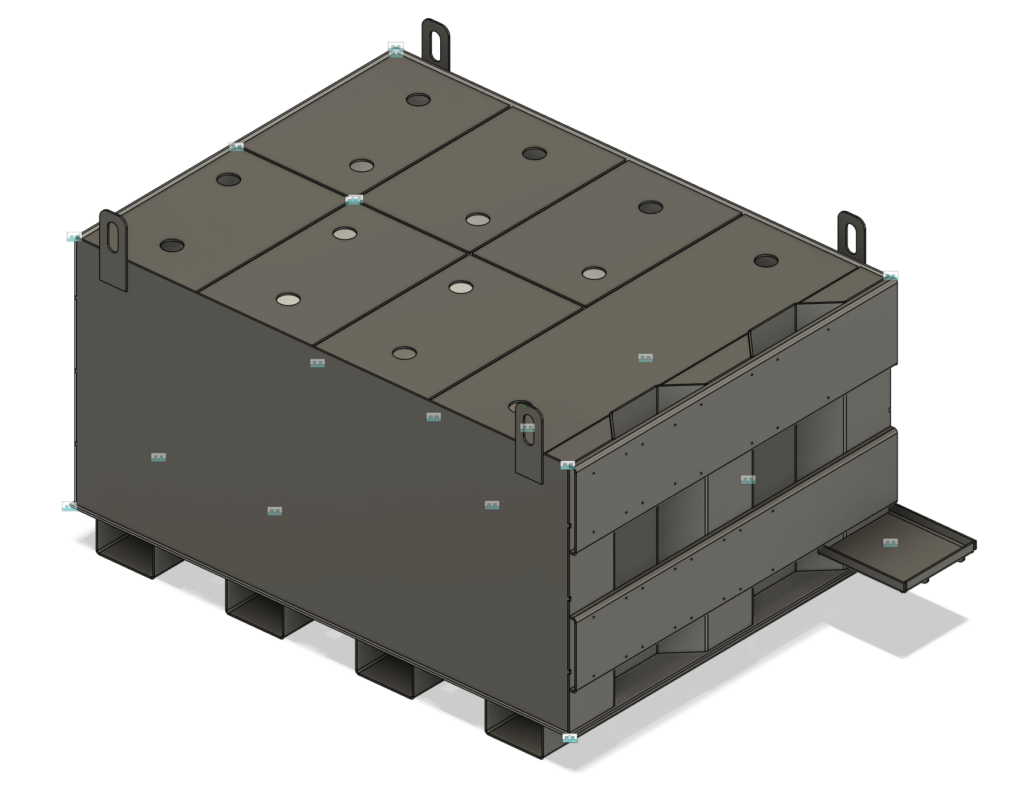
The finished model is visually simple – essentially a large steel box – but behind the scenes it contains a dense web of parametric relationships that drive every panel, cut-out, and connection.
Design & Iterations
Phase 1 – Requirements capture and overall concept
I began with an on-site meeting, walking through the client’s sketch and clarifying:
Overall envelope (length, width, height)
Number and layout of storage cells
Wall and base plate thickness ranges
Dual-liner concept for each cell
Lifting, access, and mounting requirements
From that, I set up an initial Fusion 360 assembly and defined user parameters for key values such as overall dimensions, wall/base thicknesses, clearances, and fabrication tolerances.
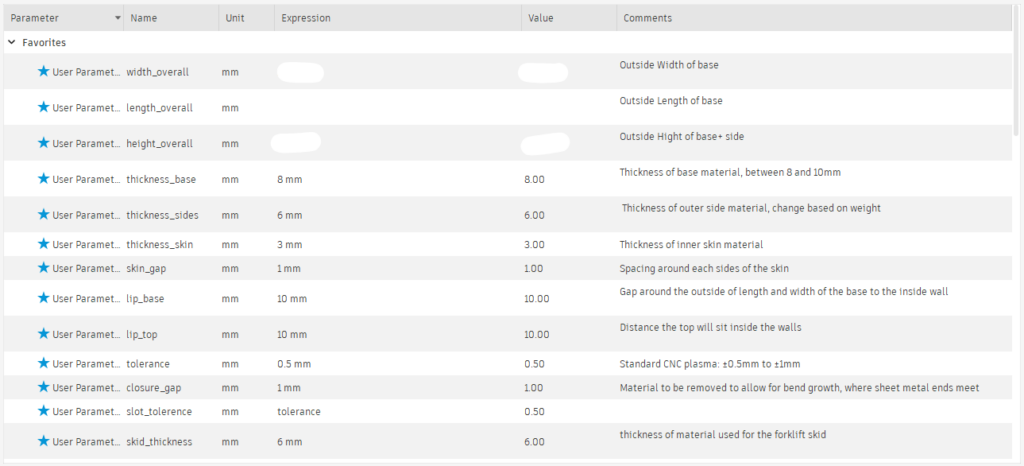
These parameters became the backbone of the design and were referenced throughout sketches and features.
Phase 2 – Parametric base plate and cell layout (bottom-up approach)
My first major modelling step was the base plate and the layout of the dual-lined cells. I approached this in a bottom-up way:
Modelled the base plate component inside the main assembly
Created sketches for outer walls, inner liners, and cell dividers
Drove all critical distances from the parameter table (overall width, wall thickness, gaps, etc.)
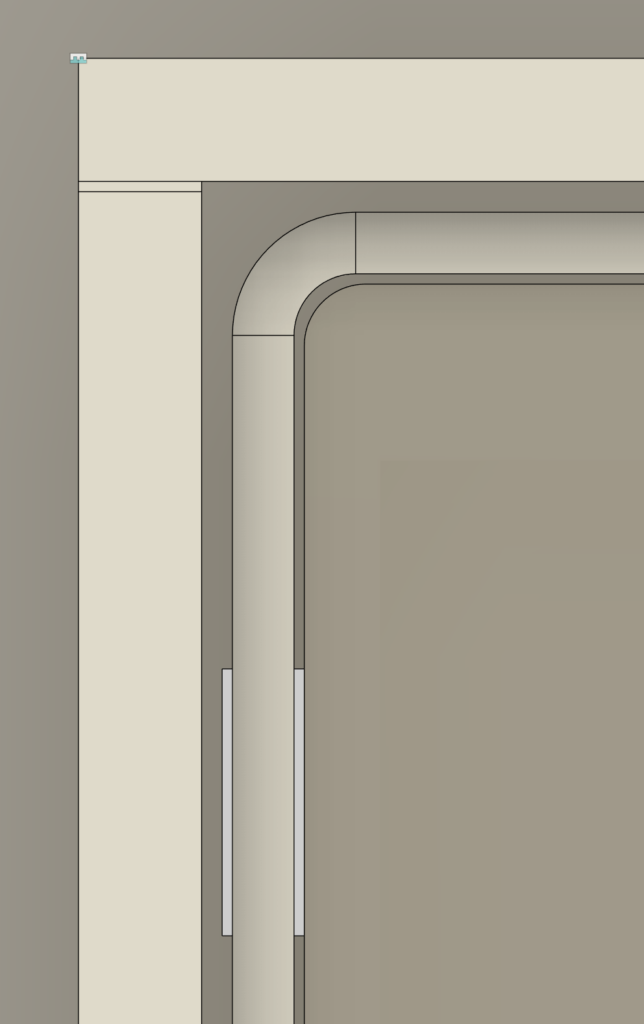
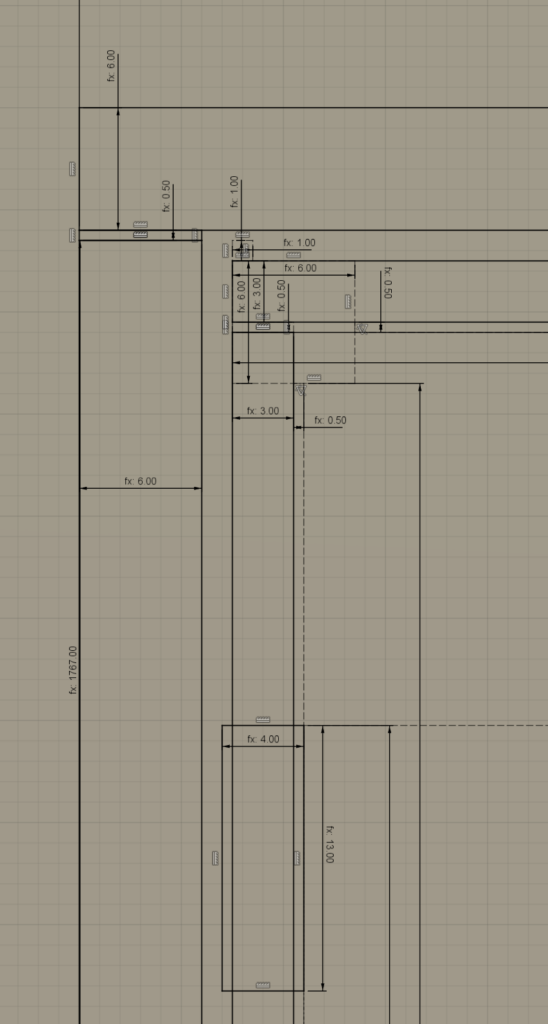
At this stage, the parametric intent worked well:
Changing base dimensions automatically updated the cell layout
Dual-lined walls maintained correct offsets
Top overlaps and lips adjusted to match material thickness and clearances
However, I built all of this inside one large assembly timeline, which set up some of the challenges I’d face later
Phase 3 – Tab-and-slot details and dual-lined walls
Once the core envelope was defined, I moved on to connection details: tabs, slots, and interlocking plates suitable for CNC laser cutting and weld assembly.
We assumed a typical laser-cutting tolerance of around ±0.5 mm and designed for assembly:
Tabs sized to nominal material thickness
Slots widened by around 0.5 mm on each side to give ~1 mm total clearance
Patterns of tabs and slots repeated across walls, liners, and baffles
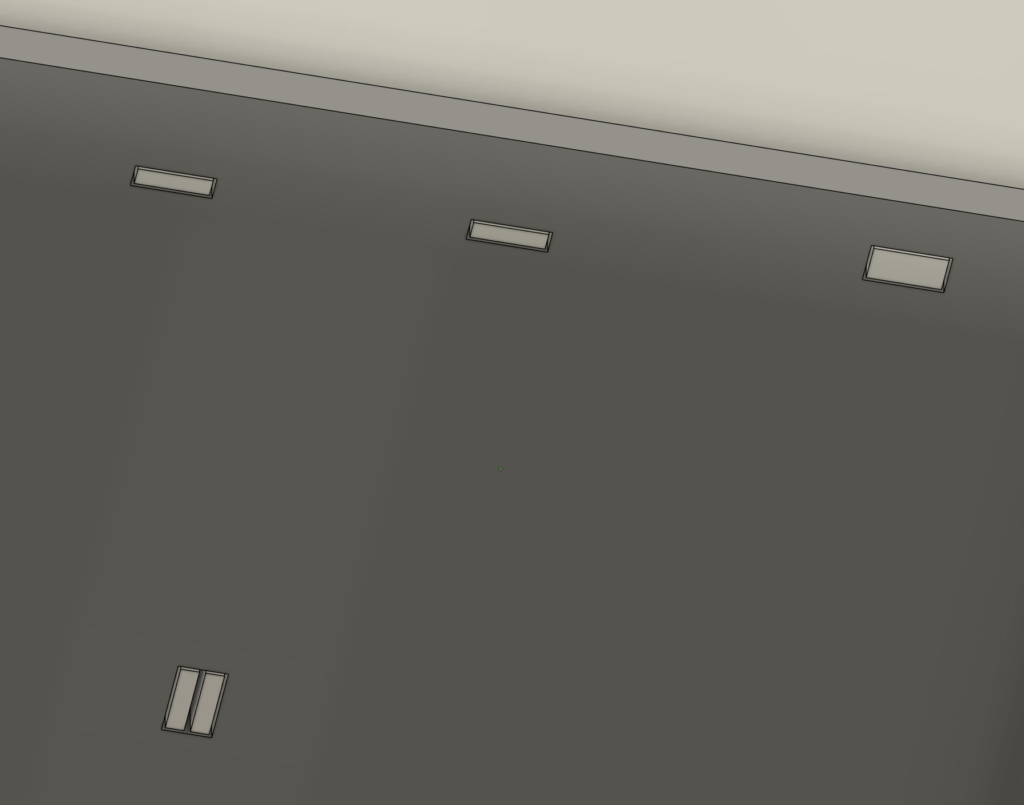
These features were also built parametrically:
Slot width as a function of material thickness and
slot_toleranceTab positions derived from cell widths and panel spans
Patterns linked back to the same global parameters
Functionally, this gave us a design that should assemble reliably even with real-world cutting variation. But every one of these relationships lived inside the same assembly file, increasing the complexity of the timeline and rebuild.
Phase 4 – Building the full outer shell and top structure
After the base and internal structure were in place, I added:
Outer panels and end walls
Internal liners for each storage cell
Sealed top plates (rather than removable lids)
Forklift skids and crane hooks
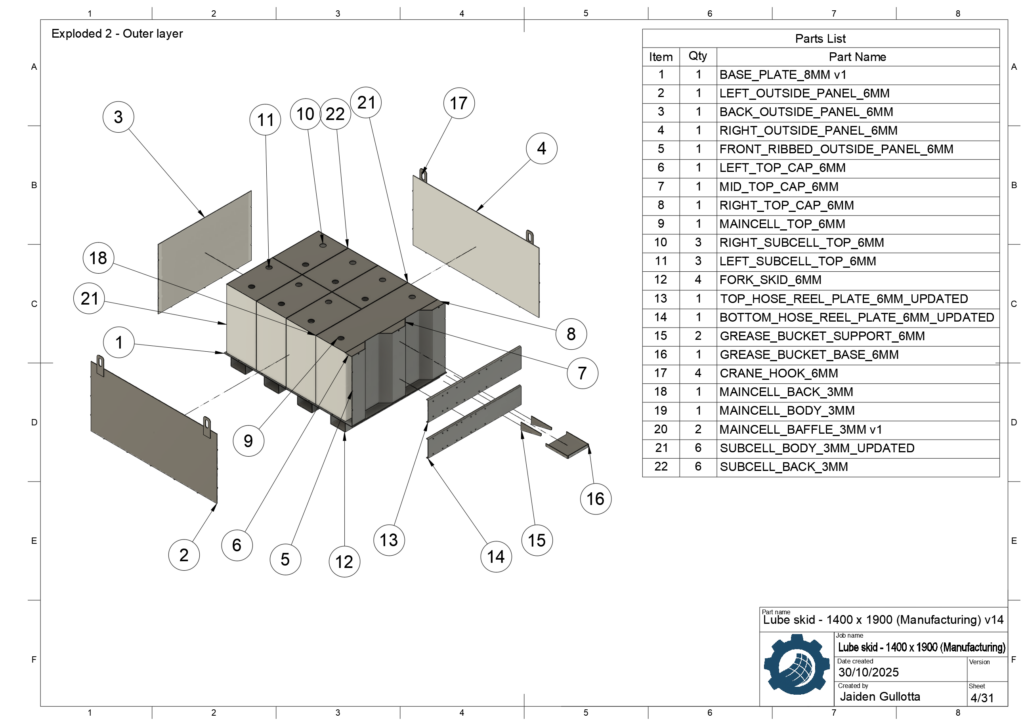
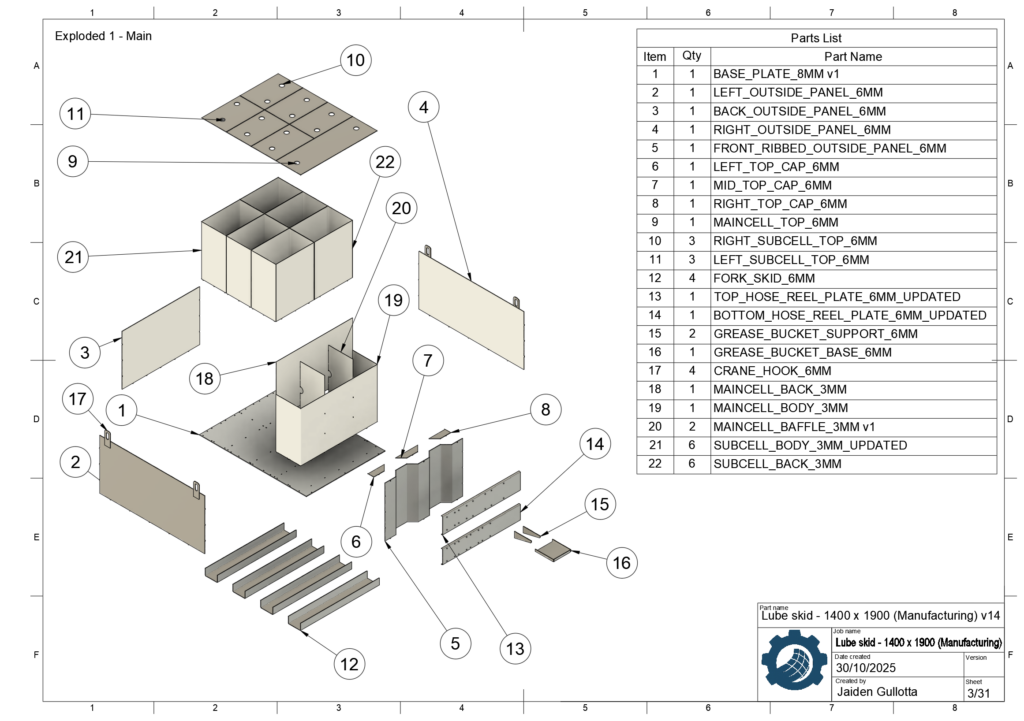
These exploded views illustrate how the skid breaks down into individual plates and profiles, each defined as a Fusion component and tied back to the parameter set.
By this point the model was highly detailed and fully parametric – but the bottom-up assembly structure began to show stress:
Many components referenced geometry from other components rather than from a shared master
Some sketches became over-constrained or fragile when parameters changed
Large parameter updates could take significant time to rebuild, and sometimes features failed until manually repaired
Phase 5 – Drawing package and Fusion 360 limitations
The final deliverable for the client was a manufacturing package:
3D model and exports suitable for CNC laser cutting
Exploded views with balloons and bill of materials
Detailed engineering drawings for each plate and assembly
This is where the weaknesses in the modelling approach became most obvious:
Creating drawing views from the heavily interdependent assembly was slow and occasionally unreliable
Exploded views sometimes rendered incorrectly or lost part associations until the model was rebuilt
A few over-defined or borderline constraints, which were just tolerable in the 3D model, caused inconsistencies when generating sheets and detail views
I worked through these issues and delivered a complete, consistent drawing set, but the process made it clear that I needed a more robust strategy for large parametric projects.
The client was pleased with the result and proceeded to manufacturing using the documentation I supplied.
Final / Planned Architecture
Final design delivered
The final lube skid design can be summarised as:
Structure
CNC laser-cut base plate, walls, and internal baffles
Dual-lined cell walls providing impact protection and secondary containment
Forklift skids integrated into the base, with crane hooks at the top corners
Parametric controls
Overall footprint, wall height, and cell layout driven from user parameters
Material thicknesses and clearances adjustable to suit different fabrication capabilities
Tab/slot geometry calculated automatically from thickness and tolerance parameters
Manufacturing
Flat patterns suitable for nesting and cutting
Welded, sealed top surface (no removable plates) for robustness
Documentation structured so fabricators can assemble directly from the drawings
Planned / future CAD architecture
From a CAD perspective, this project was the catalyst for moving to a master (skeleton) modelling approach for future work:
A single skeleton model holds:
Overall envelope and key planes
Cell layout and critical reference geometry
Parameter set for thicknesses, gaps, and tolerances
Each plate or component is then modelled as its own file/component, referencing the skeleton rather than other parts.
This architecture keeps relationships shallow and makes the assembly and drawing stages more stable, while retaining the parametric flexibility that made this skid reusable.
Skills & Takeaways
Skills demonstrated
Requirements capture and translation of a hand-drawn concept into a formal design
Parametric 3D modelling in Fusion 360, including complex sketch-driven geometry
Design for manufacture for CNC laser-cut and welded assemblies
Tolerance planning (e.g. tab-and-slot design around ±0.5 mm cutting tolerance)
Creation of exploded views, BOMs, and detailed fabrication drawings
Client communication and delivering a complete, build-ready CAD package
Key lessons learned
Assembly structure matters as much as geometry. A bottom-up approach inside one large Fusion 360 file works only up to a certain complexity; beyond that, it makes parameter changes and drawing generation fragile.
Centralised parameters are powerful but must be paired with a clean reference hierarchy. The model was technically parametric, but without a skeleton model the dependencies became difficult to manage.
Drawings expose weak modelling decisions. Over-constrained or messy relationships that seem acceptable in 3D become painful when producing 20+ manufacturing sheets.
- Master/skeleton modelling is worth the upfront effort. For future large projects, using a skeleton to drive separate part files will improve rebuild performance, drawing stability, and scalability for new variants.
This project turned a simple-looking steel box into a valuable learning platform for robust parametric design and documentation—experience that directly transfers to other industrial enclosures, sheet-metal structures, and heavy equipment components.
